11/28/07

Coconut-Raspberry Jam Cookies


Its been a long time since I wanted to share this recipe with you all. What makes these cookies special or different from other thumbprint or jam n jelly cookies is the coconut. And they look so pretty ....I could not resist posting 'too many' pics of them .

The recipe is simple, you make the cookie dough, chill it , make cookie size balls , roll it in coconut , give them your thumbprints, drop the jam n bake them. You don't use any coconut extract/essence , the shredded coconut lends its flavour.


Ingredients:

3 sticks/1.5 cups of unsalted butter, at room temperature,
1 cup sugar,
1 tsp. vanilla extract,
3 1/2 cups all-purpose flour,
1/4 tsp.salt,
1 egg beaten with approx. 1 tablespoon water, for egg wash
7 oz. sweetened flaked coconut,
Raspberry jam


Method:

Sift together the flour and salt.

Cream together the butter and sugar until just combined using an electric/hand held mixer, add vanilla extract, the flour mixture and mix until the dough starts to come together. Dump on a floured board and roll together into a flat disk. Wrap in plastic wrap and chill in the refrigerator for 30 minutes. Roll the dough into small, walnut size balls.

Dip each ball into the egg wash and then roll it in coconut. Place the balls on an ungreased cookie sheet and press a light indentation into the top of each with your finger. Drop a little jam into each indentation. Bake in an preheated oven , at 350 F for 20 to 25 minutes, or until the coconut is a golden brown. Cool and serve.

You can use any jam you like. Using different color jams like mango, grape or even mixed fruit will make a colorful presentation . Also if you dont find the sweetened shredded coconut, I have also tried these with dessicated coconut and it works just fine :)


These are all boxed and packed and shipped to Zlamushka's beautiful event
Spoonful of Christmas


11/13/07

Its ME time :)


Before the labor day weekend Zlamushka tagged me for a MeMe. What happened then was, I went to Bar Harbor and then took a blogging break for Ramadan and since the time i started blogging again, this ones been a work in progress...... until Jeena tagged me :) I thought its high time i complete both the Memes.

SO first up, Zlamushka asked me to write about me / my qualities beginning with each letter corresponding to my middle name. I saw many of the fellow bloggers, due to certain reasons of course, took the liberty to use their own name, and I did the same (I hope its ok ....?...)

Realistic

Absent minded (of course!)

Homely

Indian (Hindustani) at heart

Nature lover (plz....who is not ?.... :D)

Since the words are self explanatory and I have few more things to say , I wont elaborate on those.

Next up , Jeena asked me to share random things about me , well the first one in the series would be , I am bad at talking about myself :) , its not that easy for me :D


I have an inclination towards learning languages,

I like to travel, different people, cultures, traditions, cuisines fascinate me,

I like things to be organised, I think it simplifies ones life,

I appreciate 'good' poetry,

I never thought I could cook,

I am not a big movie buff , i do enjoy music occasionally

I believe simplicity is beauty.....simplicity is happiness

Finally,Thanks to Zlamushka and Jeena for tagging me. Though it was a bit intimidating at first, I really enjoyed participating and had fun writing these memes....

11/8/07

Fish Fry

As a child I would eat fish cooked only by my mom , because it would not smell fishy at all, and of course it would be very tasty. Though i love macchi ka salan (fish curry) , my husband prefers the fried fish. You get the Indian varieties of fishes like Pomphret, at the Indian grocery stores, but this is for the first time that i tried the recipe using Indian ingredients with Mahi Mahi, and its a winner!

Before going to the ingredient list , this is my moms tip to get rid of the fishy smell. All you do is sprinkle some lemon juice and salt over it , let it sit for 10 mins, then sprinkle any flour you have handy e.g. maida, besan , rice flour and scrub each piece. Now wash each piece at least 5-7 times, just rinse it. If you have any other way of getting rid of the fishy smell , plz share :)


Ingredients :

6-7 fillets of mahi mahi / pomphret or any you like :D

1 tsp. red chilli pdr,
1 tbsp. dhania pdr/pdrd. coriander,
juice of 1 lemon/ or tamarind pulp,
1 tsp cornflour,
salt to taste,
1/2 tsp each of ginger paste and garlic paste,
1/4 tsp turmeric pdr./ haldi,
1 cup All purpose flour,
Oil for frying.

Method :

Mix all the ingredients together, except the all purpose flour/maida, and make a paste, use little water if required. Apply this paste on each side of the fillet and keep aside for few minutes. Now heat a griddle , place fish n pour sufficient oil from sides. Fry till golden brown on both sides. Drain on paper towel, and serve hot. If the fillets are thick, make slits on them and apply more paste , also you may want to shallow fry them.


I am sending this recipe for the "Power" less cooking event, hosted by Easy Crafts of Simple Indian Food

To me this was an exciting event, a way to sit back and remember the good old ways of cooking ! I have relatives who still prefer the stone grinder to make their idli batter :D

10/30/07

Individual Cheese Cakes


Ramadan is over ....n left us in its anticipation for the next year, a joyous day of Eid n you don't want the time to fly.... as it does.

Meanwhile I see I've missed out lot of action and interesting events esp. the Weekend Herb Blogging - two yrs already and still rocking...good going :)

Nevertheless, lets talk cheese cakes, even better....individual cheese cakes , this way you avoid cleaning your knife , wiping it every time you take a slice etc etc :).


I like this recipe because apart from being delicious, it can be made ahead , looks good, easy to serve and clean up too... great for a party !

This recipe also uses many shortcuts , like using Nilla wafers for the base , instead of making individual ones , n using store bought pie filling for the topping. If you don't find the Nilla wafers, go ahead and use any sweet cookie which will fit in the base of your muffin pan. Don't go for the sandwich cookies though, it will be too thick for the base. You can also make your own topping by just using some fresh berries n kiwis or soaking some fresh fruits in simple syrup, or using any home made fruit preserves etc. The options are many , so go ahead , be creative !


Ingredients:

2 (8 oz.) packages cream cheese, softened,
1 cup sugar,
1 tsp. vanilla extract,
2 eggs,
12 vanilla wafers,
1 (21 oz) can cherry pie filling or other pie filling (optional)

Method:

Preheat oven to 350 degrees F.

Place a paper cupcake liner in each cup of muffin pan. Beat cream cheese with a handheld electric mixer until fluffy. Add sugar and vanilla, beating well. Add eggs, 1 at a time, beating well after each addition. Lay a vanilla wafer, flat side down, in each muffin cup. Spoon cream cheese mixture over wafers. Bake for 20 minutes. Allow to cool completely. Serve with cherry filling on top, or pie filling of your choice.

P.S : Refrigerate the cheese cakes for few hours before serving / overnight for a better taste .

9/13/07

Ramadan Kareem !


Listen, O drop, give yourself up without a thought,
that in return you may gain the Ocean.

Listen, O drop, bestow upon youself this honor,
and in the arms of the Sea be secure.

Who indeed should be so fortunate?
A Sea wooing a drop!

In God's name, in God's name, sell and buy at once!
Give a drop, and take this Sea full of pearls.

-Rumi
[IV, 2619-22, Mathnawi]
Translated by Camille and Kabir Helminski


Ramadan Kareem to you all !

The blessed month has begun and I will be taking a blogging break. Which means I will be checking on you all, just not as often :) Hopefully I will post my Ramadan recipes n pictures later.

May the Almighty accept our fasting, accept our tears, forgive our sins, and extend our years. May this blessed month be a source of mercy, guidance, unity, and peace that permeates throughout the world. Ameen.


Click here to know more about Ramadan.

(Image Source: Wikimedia commons)

9/9/07

Food Finds !


Over the labor day weekend we went to Bar Harbor, Maine. It was a lot of fun, we stayed in a small, cozy, oceanfront cottage, went hiking, explored the Acadia National Park etc... Of our 4 day tour we spent a day in East Boothbay village of Maine. Almost at all places we were fortunate to find good food at unexpected places. No research involved, we would eat when we were hungry and which ever place we were at.

Like, We ate this Italian Veggie sandwich, in a general store ......ya...you heard me right ....a local corner general store in East Boothbay, and it was the best veggie sandwich I ever had. The pesto used was just perfect :P


After the first day of hiking in the Acadia National Park, which was an easy one, all we needed to cool down, was this Wild Blueberry Crisp a la mode at the Jordon Pond Restaurant located in the park ...well, Maine is all about wild blueberries afterall (they even have a wild blueberry soap! :))


Talking about blueberries, We had the most delicious wild blueberry pancakes, a local favourite, here at Jordans Restaurant in downtown Bar Harbor (or should I say BA HAA BA:)). I could not take decent pictures of the restaurant due to the traffic situation on the main street, this one is taken from the parking area :)


Nothing could be a perfect treat to end our trip than the Maple Walnut Ice cream (...yum) . Though we went to the Ben n Bill's Ice cream place in downtown Bar Harbor almost everyday and tasted their specialty flavor .....any guess ? .....ya right .....wild blueberries:), I personally liked the maple walnut flavor, my hands were smelling maple walnut for two days even after we came back ... it was a sweet ending to our short and sweet vacation.


We now intend to go and relive the experience more often , the mountains , the ocean, the calm, its all very inviting.

Roasted Red Pepper Hummus


Hummus is a traditional mid-eastern dip traditionally served with flat bread. The word itself means chickpeas in Arabic. Its one of those healthy foods which tastes good :) .

Other thing I love about hummus is that its ready in no time and could be made ahead of time . Making your own hummus has its own advantages over the store bought ones . You do not compromise the taste (in fact homemade tastes better), you know what ingredients and the quality of ingredients that goes into it plus its very economic.

The basic hummus recipe includes chickpeas, tahini , lemon juice but you can flavor it with garlic, cilantro, chili flakes, rosemary or roasted peppers like I did.

Ingredients:

16 oz. can of chickpeas/garbanzo beans, drained and rinsed thrice,

3 tbsp. tahini paste,

juice of 1 lemon,

3 cloves of garlic , coarsely chopped

2 tbsp. cumin pdr,

1/2 tsp. salt,

1 tsp. chili pdr,

1 red peppers, roasted n skinned (tip below)

few tbsps. water, if needed.

Method:

To roast the red pepper:

Rinse n wipe dry your pepper n just roast it on a open flame till it blackens. Put it in a plastic or paper bag n let cool slightly. Remove skin and coarsely chop the pepper into cubes and keep aside.

OR

Put in under a preheated broiler for 5-10 mins. or till the skin of the pepper blackens. Put it in a plastic or paper bag n let cool slightly. Remove skin and coarsely chop the pepper into cubes and keep aside.


Now place chickpeas, tahini, lemon juice, cumin pdr, salt, chili pdr and garlic cloves in a food processor. Process for 2- 3 minutes until beans are coarsely chopped, now add the roasted red pepper , scrape the sides of the processor and process an additional 2-3 minutes. Use very little water, if needed, to achieve the desired consistency. Mix well and store in a glass container tightly covered. Refrigerate overnight (or at least few hrs) to allow the flavors to develop. Serve it with a drizzle of extra virgin olive oil (optional) alongside some pita chips.


A tip from me is to use a food processor and not a blender to make hummus.

The more its rests the better it tastes and the flavors develop.

You can use the dried chickpeas too, just soak them overnight in warm water...but I think the canned ones work fine.

8/30/07

Lemon Squash n Pickled Onions !!!


Labor Day weekend is just around the corner and we are planning a road trip... thanks to Anupama's Picnic Food event, I now have so many tasty options to pack for munching n brunching.

One of my favourite things to do before road trips is pickled onions, just because it can be made way ahead of time, its easy to do, is ready in no time , jazzes the taste of any plain old sandwich/ wrap n looks gorgeous hot pink :) .


All you need is :

2 large thinly sliced red onions, i use the food processor,
some boiling hot water,
juice of 1 -2 lime/lemon, preferably lime,
salt , to taste.

Method :

Pour boiling water over the sliced onions n keep aside for few secs. Strain the onions in a colander, remove all the water by tapping the colander and dump the onions in a container, to this add the lemon juice n salt n refrigerate till you use.

You can immediately see the onions start to change their color. These onions go well with tacos too. Though this is the basic recipe for pickled onions, u can add green chillies or sugar or any pickling spice .... try any combination of flavors.

Now time for some home made lemonade. Why not make a lemon squash ? Keep it in your cooler/ icebox n just stir in some water when ever you want to have a cool sip.

I flavored mine with ginger, you can use mint or both ginger n mint ....what ever u like ...


Feel free to add n reduce the quantity of lemons n sugar, depending on how sour the lemons are n how sweet u like your lemonade. The following recipe yields 1ltr. of syrup


Ingredients:

2 cups lemon juice,
3
cups water,
3" ginger root, chopped into thin slices,
2 cups sugar,
1 tbsp white vinegar.

Method:

Boil water n sugar in a pan , till the sugar dissolves (at this stage u can add more sugar if you want , but make sure that u boil the syrup after sugar is added) . When all the sugar is dissolved remove it from heat n let cool completely. Then add the lemon juice and vinegar, mix well, throw in the ginger , cover n let it steep for at least 12 hrs , the more you steep the better. Now remove the ginger slices with a spoon, give it a stir n store in a sterilized glass bottle. You can also strain it before transferring into the bottle. Keep refrigerated.

Once the syrup is made , all you have to do is, stir in 1 part of the syrup (or to taste) to 3 parts of water n enjoy.

8/29/07

Microwave Milk Peda !


We once had to visit one of my husbands friend who just had a baby girl, we were running late n were not sure if we would have enough time to pick some sweets on the way, that was the first time I tried these Pedas .....ready in a jiffy....n it was a huge hit in their family ... I have made these many times since then ....after all who does not want a quick n fuss free dessert !


So when I learnt about Srivalli's Microwave Easy Cooking Event I thought of sharing this recipe of Milk Peda with all of you.

Come to think of it, it would also make a good picnic food, a traditional Indian dessert for picnic in park :)


Ingredients:

1n 3/4th cup Milk powder,
1 can sweetened condensed milk (14 oz.),
1tbsp. butter, at room temperature,
1/4th tsp. cardamom/elaichi pdr.,
few strings saffron, crushed or whole,
few chironji/ sunflower seeds , slightly dry roasted, to garnish, optional.


Method:
Whisk together milk powder, condensed milk n cardamom pdr. You can also beat the mixture nicely using a fork. Add butter n whisk again for a min. Stir in the saffron n mix well . Now microwave this mixture on high for 2 mins. Remove, let cool slightly, so that you can handle it with your hands.Grease your hands with a little ghee, make small balls of the mixture while its still warm n flatten slightly or roll in desired shapes. Garnish with sunflower seeds/ saffron strands. You can also use a toothpick to decorate.

As simple as that, this recipe is also very versatile. You can try the same recipe with different combinations of flavorings and garnishes . You may also add more milk powder if you experience problem forming the pedas. Enjoy !

Good thing !

I feel extremely happy to share with you all the award which was passed to me by Pravs of Simply Spicy over the past weekend. Thanks Pravs :)


Though most of my Fellow Bloggers have already received this award earlier...I would like to pass it on to,

Keep Rockin' :)

8/23/07

Dal Fry


This is my kinda comfort food ....some hot rice , dal fry , lots of mom-made desi "ghee" (don't panic :D ) , achaar or papad as a side n I am all set.

There are many different recipes for dals or dal frys. In fact every Indian household will have its own unique recipe. As a child I loved the dal my Dadi (paternal Grandma) made ...nobody makes it like she used to. Back in my school days, once in a blue-moon my Dad would cook biryani, desserts , Kheema etc ...n it would be a huge event ......all of us would "assist" him ....I mean everyone who was present ...kids, maids, friends, relatives.....distant relatives :D It was fun.

So the point is I had my first lesson about "dal" from my father. While he was cooking he would give us all his expert tips, talk about food n cooking etc...I will share "his" recipes hopefully in near future. For now lets talk Dal Fry...


Ingredients:

For Dal:

0.5 cup yellow Moong dal / split green gram
0.5 cup Masoor dal /split red lentils
1 medium onion, chopped,
2-3 green chillies (or to taste),
1/4 tsp. haldi/turmeric powder,
1/2 tsp. ginger paste,
1/2 tsp. garlic paste,
few coriander leaves, chopped
1 tsp. oil,
at least 2 cups water, or more,

1 lemon size ball of tamarind, soaked in warm water,
salt to taste.

For tadka/tempering:

2 tbsp. Ghee,
1 big clove of garlic, smashed with back of knife n roughly chopped
1/2 tsp. zeera/cumin seeds,
1/4 tsp. black mustard seeds,
few curry leaves/curry patta.

Few coriander leaves .

Method:

Cook together all the ingredients for dal except tamarind and salt using sufficient water till the dal is soft n tender/cooked thoroughly. Remove from heat, now smush it using dal ghotni/ rawi/hand blender or just pulse it in ur blender. Return to stove on low-medium heat. Extract and strain the pulp of the tamarind. Add it to the dal. Add more water to get the consistency you want(thinner/ thicker) Now add salt and bring it to a boil. Keep aside.

Meanwhile heat ghee in another vessel(large enough to accommodate the cooked dal) for the tadka/tempering. Add the garlic clove , zeera/cumin seeds , mustard seeds to the hot ghee. Let them splutter then add curry leaves, cook all this till the zeera n mustards turn black. Immediately add the cooked dal to the tempering n cover the vessel , cook on med. heat for a min. Remove from heat add chopped coriander leaves n cover with a lid. Serve hot/warm.

8/16/07

Walnut Cookies

When I got to know about Anupama's Picnic Food event, the first thought that came to my mind was that it was a brilliant theme , just on time for the labor day weekend !! Good thinking Anupama :)

My idea of ideal picnic food is something which can be made ahead of time (usually), which need not be served warm/hot, does not become soggy, and is easy to serve, eat and clean up.

Stuffed parathas, frankies, spiced rice varieties, sandwiches, one pot meals, soups, savoury rolls, snacks like cakes, cookies, dhokla, sago kichdi, chivda, bhadang , kebabs ,spiced nuts, chips , nachos , fresh fruits n juices etc.... etc.... etc. I was so inspired by the many options one has, that I decided to dedicate a category for picnic foods on my blog :) .....hopefully you will see me sharing some recipes fit for picnics there. For now I am sending this quick and simple Walnut cookie recipe for this event ....Fun in the Sun

If you have never made these cookies , I highly recommend trying out this recipe at least once. The whole process is so simple, and the aroma when these are baked is soooooo good ....you must try it to believe it. So lets get started.


Ingredients:

2 cups flour
2 cups ground walnuts,(I used mini chopper to grind )
2 sticks butter, room temperature,
1/3 rd cup sugar,
½ tsp salt,
1.5 tsp vanilla,
powdered sugar.

Method:

Mix flour, ground walnuts and salt and whisk them together. Beat butter and sugar for 1.5 minutes scrapping the sides of the vessel. Add vanilla and the flour- walnut mixture. Beat till it just mixes well n comes together. Scoop out cookies using a tbsp. measure just to ensure they are of same size.

Roll in desired shapes.

Align on parchment paper and bake at 325 for 17- 19 mins., turning around half way through once.

Remove and let cool for 1 or 2 mins. (not more) , roll them in pdrd. sugar. This recipe will yield approx. 25- 30 cookies

8/9/07

Kesari bhaat in five !

This is another quick n easy recipe. It hardly takes five minutes to cook. The secret is.... the pressure cooker. Try this when you have no time for elaborate desserts and want something simple. This is my entry for Shaheen's Express Cooking Event.


Ingredients:

1 cup Semolina / sooji / rava,
1 cup Sugar,
1/2 cup ghee,
2 cups water,
cardamom powder,
1/2 tbsp. raisins,
1/2 tbsp.cashews,
1 tsp. chironji / charoli (optional),
Yellow food color.

Method:

Heat ghee in pressure cooker, add raisins and nuts, add rava / sooji and stir for 2 mins. Meanwhile bring water to a boil and add yellow food color to it. Now add sugar to the roasted rava. Pour the hot water, close the cooker, put weight and cook for 3-4 mins. Reduce pressure by placing the cooker under running tap water. Open , sprinkle with elaichi pdr and serve warm. Enjoy !

8/7/07

Quick Kulcha


This is one of the recipes I learned from my sis. It does not need baking in oven or tandoor, no resting time,etc... I also call it "tava (griddle) top" kulcha :).

Remember its not the traditional
kulcha...its quick kulcha :)


Ingredients:

2 cups maida / all-purpose flour,
1 cup dill, finely chopped,
1 small onion, grated,
2 green chillies, minced, (optional)
3 tbsp. curd / yogurt,
ghee / oil, for frying,
salt to taste.

Method:

Mix all the ingredients, and knead into a soft dough using water. The onion and the curd, both have water content, so be careful with it, don't add too much water. Divide the dough into lime size balls. Roll these balls into flour.

Now roll out each ball into 3" circle, apply ghee / oil , fold it into half to get a semi-circle and then fold it one more time to get a triangle. Again dip into flour and roll out into a circle.

Cook on a hot griddle (medium heat) till brown specks appear on both sides. Apply ghee and serve hot.


I served it with a mix vegetable curry. It also goes well with minced meat (Kheema).

7/12/07

SOS and AFAM - Watermelon


SOS - Share Our Strength, invites us all to join them in their effort to end Childhood hunger ....all you have to do is organise a bake sale anytime till 31st of August 2007 and donate the proceeds to the organisation.

I thought of posting about this event because there are so many people who cook , bake and blog everyday . I may not know a lot of them as i have just joined the blogging world but if "you" know, you could spread the word, for details please click here.

Now for the AFAM- Watermelon event hosted by Bee and Jai from Jugalbandi (got to know about the event through Asha's blog Aroma).


Watermelon is one of my favourite fruits. Nothing compares to taking a big bite of a fresh, juicy sweet watermelon on a hot sunny day. Take it with a pinch of salt (or black salt), pepper or squeeze some lemon on it ...

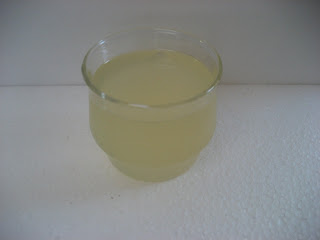
I thought of many options for this event , milkshake, sorbet and many recipes on the net etc... finally this is what i came up with .....just plain watermelon juice blended with some salt n sugar .....A well chilled glass of this is amazingly refreshing. I was so tempted to add lemon or lime juice to it ....but I do not regret not adding it :)

I avoid using ice cubes in fresh fruit juices, instead I prefer to chill it in the refrigerator or keeping the juice in an ice bucket .


Ingredients:

2 cups watermelon cubes,
1.5 tbsp. sugar, or to taste,
a big pinch salt.


Method:

Dump all the ingredients in the blender and puree them. By pureeing, and not 'blending' you get a thick and frothy juice. I didn't strain it because I like the texture, but you can. Serve chilled.

7/11/07

Lemony Blueberry Bars

These lime and lemon "melt in your mouth" blueberry bars, are easy to make, look good and taste delicious, not to forget the wonderful aroma that fills the air ....


Ingredients:

For the crust:

1/2 cup all-purpose flour
3/4 cup yellow corn flour
6 tablespoons powdered sugar
1 stick (1/2 cup) cold unsalted butter, cut into pieces
1/2 teaspoon salt

For the filling:

3 large eggs
1/2 cup sugar
1.5 tbsps. all-purpose flour
1/2 tsp. lemon zest
1/2 tsp. lime zest
1 tbsp. fresh lemon juice
1 tbsp. fresh lime juice
2 tbsp. whole milk
pinch of salt

2 cups blueberries
3 tbsp. apricot jam

Method:

To make the crust:

Preheat oven to 375 degrees F.

Butter a 8-inch square glass baking dish and line it with 2 sheets of aluminium foil, overlapping them in opposite directions so that there is overhang on all 4 sides.

Pulse together flour, corn flour, powdered sugar, salt, and butter in a food processor until mixture resembles coarse meal. Press onto bottom of baking dish and 1-inch up sides. It may seem loose but will turn out well if you press it well. Bake in middle of oven until golden brown, for about 20 minutes.


To make the filling:

While crust bakes, whisk together eggs, sugar, flour, and zests. Whisk in juices, milk and a pinch of salt. Pour the whisked egg mixture into the hot, baked crust immediately, then bake until just set, about 17 minutes.

Now heat apricot jam in a nonstick pan till it melts. If it has pieces of apricot in it then strain it after melting .Toss blueberries in the heated jam in another bowl.

After the egg mixture gets baked, remove it from the oven and gently spoon berries evenly over top and bake for 2 more minutes . Transfer baking dish to a rack and cool. Coverwith plastic wrap and chill overnight or atleast for 8 hours. Use foil to lift dessert out of dish. Cut into squares and enjoy.

6/21/07

Back to blogging


B2B ! Yep ....back to Boston and to blogging. Its been almost fifteen days now , since i came back from India and am now finally getting back to routine. Meanwhile, I guess I missed a lot of action, and no, that's not my house in India :)).


Amidst of all the crazy running around, shopping, eating, meeting, greeting ....etc...I am so glad to have found these two books and cant wait to try n share the recipes.

"Nuskha -e - Shahjahani" by Salma Hussain are the actual pulao recipes from the royal kitchen of Shah Jahan and "The Book of Indian Sweets" by Satarupa Banerjee is a collection of dessert recipes from all over India. Both books, I must say, are very informative. So hope to share some new and wonderful recipes with you all soon ! and Thank You for dropping by even when I was away.

3/26/07

Dill Chicken Do Pyaza :)


"Necessity is the mother of invention" they say......that's exactly how I came up with this recipe, and yum... was it delicious!

I am travelling to India on Saturday and perhaps this is my last post for the month, but that's a different story. The point is since I am travelling I "have to" use up all the veggies and poultry etc stocked in the fridge .

So, Dill chicken do pyaza - never heard of this recipe ? :) of course you never heard that , its named so because I added dill to the chicken curry and do pyaza because , I added the onions (pyaz) twice :)) .... there you go !


Ingredients:

1 chicken breast, washed and cut into cubes,
1 large onion , thinly sliced
1 small tomato, finely chopped
1 small (or half of large) bunch of dill ,
3 tbsp. mint , chopped,
3 tbsp. coriander leaves, chopped
1 tbsp. ginger- garlic paste,
1/2" cinnamon stick,
1/4 cup coconut milk (or paste)
1/2 tbsp. red chili powder, or to taste ,
salt to taste,
1/4 tsp. turmeric pdr,
1/2 tsp. cumin pdr,
2 tbsp. olive oil (or any cooking oil)
1 green chili, cut in halves , lengthwise

Method:

Fry half of the sliced onions till golden brown on mediun heat and drain it on a paper towel. Keep aside.

Heat oil , add remaining onions and fry them till they lightly brown. Add chicken, ginger-garlic paste , salt , red chili pdr, cumin pdr, turmeric and cook till the raw smell of the spices is gone . Add the coconut milk, stir everything to mix well. Now add the cinnamon stick . Cover and cook for few mins. , just till the coconut milk starts to boil (you can also add water if you want more gravy). Add tomatoes let them cook then add dill, mint leaves, coriander leaves and cover the dish again. Cook for few more mins. Now crush the fried onions using rolling pin to a fine powder and add to the chicken curry. Finally add the green chilly and cover the dish , cook for few mins . and turn off the heat. Do not remove the lid immediately . Serve with rotis or rice.

Chopping Onions ?

Every one has some suggestion when it comes to chopping onions , or at least is looking for one. I heard them all, from looking away , wearing glasses (yes!) , soaking them in water, keeping the cut side up and cutting after some time etc... etc... etc...

Few days back I came across this very useful and effective tip(saw it on TV).

Chopping onions makes us all cry .....doesn't it ? So the next time you chop onions , just light a (scented) candle near your chopping board and there will be no more tears ....it really works.

3/20/07

Home made Soan Papdi/Soan Halwa


Also known as Soan Halwa , Soan papdi is one of those sweets which is easy to cook, gud to eat . I will be travelling to India this month end, so this recipe was an effort to use up some of the gram flour (besan) . Any suggestions for the remaining flour ?

For those of you who have never made a 2 thread consistency syrup , here is a tip , it takes longer than the single thread consistency :) to check the doneness press the syrup between your thumb and forefinger and gently pull apart , you should see two threads of the syrup ... simple :)


Ingredients:

1 cup plus 1 tbsp ghee

Sift together:


1 1/4 cup gramflour (Besan)
1 1/4 cup All purpose flour (maida)For the syrup:2 1/2 cups sugar
1 1/2 cup water
2 tbsp. milk
a generous pinch of saffron
For garnish:

1/2 tsp. cardamom pdr
2-3 tbsps. pistachios, sliced


Method:

Sift both flours together.

Heat ghee in a heavy saucepan. Add flour mixture and roast on low till light golden. Add 1/4 tsp cardamom pdr , mix well. Keep aside to cool a little, stirring occasionally. Prepare syrup simultaneously.

To make the syrup cook the sugar , water n milk , do not let it boil untill the sugar is dissolved. The milk is added to remove impurities , so discard the scum or stratin the syrup once the scum is formed and continue cooking. Now add the crushed saffron threads. Bring syrup to 2 1/2 thread consistency. Keep an eye on the consistency , once the required consistency is attained pour the syrup at once into the flour mixture. Beat well with a large fork till the mixture forms threadlike flakes. Pour onto a greased surface or thali and roll to 1" thickness lightly. Sprinkle the cardamom powder, pistachios and gently press down with palm.Cool slightly, cut into 1" squares, wrap individually into square pieces of plastic wrap or polythene sheets . Store in an airtight container.

Update : This recipe has consistenly been the most read and viewed one ever since its been published. Though its very tempting to make it, not everybody is successful.

 Recently Suresh from Pune commented ".... No doubt that the recipie displayed here tastes good (and thats what really matters) and I am going to be making it many more times in the future. However, it is for 'soan halwa' and not for 'soan papdi'. "


So I decided, to rename the recipe as Soan Papdi or Soan Halwa and avoid any disappointment to my precious readers.
 
Whether you get papdi or halwa, the point is to enjoy making it and eating it with family and friends.
 
Happy Cooking my friend !

3/14/07

Murgh Khushka

Let me simplify --- It is a chicken flavored rice :) Though there is no chicken used in its preparation, the flavor comes from its broth which I had made earlier this week . The chicken broth/stock available in the store also works well with this recipe. Using broth instead of water to cook the rice gives it a dense and rich flavour. If you want just a hint of the chicken flavor (or are falling short of the stock :)) just dilute the broth with water.

The vegetarian version would be made using Vegetable stock and some chopped vegetables.

The Murgh Khushka goes well with anything from pickles, Dal to exotic , moghlai curries
.


Ingredients:

2 tbsp. Ghee or oil
1 med. onion , thinly sliced,
2 cardamoms,
1/2" piece of Cinnamon,
2 cups Basmati Rice, washed
approx. 4 cups Chicken stock/broth, more if needed,
1/2 tsp. Ginger paste,
1/2 tsp. Garlic paste,
1 tbsp. mint leaves, chopped,
1 tbsp. coriander leaves, chopped,
1 green chilly, slitted,
salt to taste,
Finely chopped coriander leaves, as garnish.


Method:

Heat ghee, add cinnamon stick , cardamom and green chilly , let it fry for few seconds , then add onions and cook till they turn slightly brown. Add the ginger , garlic pastes, mint leaves , coriander leaves and cook for few mins. , don't let it burn , keep stirring. Now add the chicken stock and bring it to a boil over high heat. When the stock starts boiling, season it with salt and add the Basmati rice. Let it cook in the broth on high for 5 mins. , then reduce the flame n cook uncovered till almost all of the broth is absorbed by the rice . There should be very little broth still visible. At this stage cover the dish with a lid n reduce the flame to low. Cook till done or you see steam coming out from the lid. Remove from heat and let it rest for few minutes before opening the lid.

3/8/07

Apple Tatin - A crowd pleaser :)

The history of how tatin (tah-tan) was first made is very interesting. It's hard to believe that it was an outcome of a mistake...but once you taste it you know exactly why people did not mind.

You can use any variety of apples, preferably Granny smith or Golden delicious . The lemon zest n the caramel ....yumm... it is a must try.
So next time you want to please a crowd (or yourself)...go ahead and try this recipe...it looks, tastes and even sounds very impressive... (The photo does no justice to its actual beauty:))


Ingredients:
6 tbsp. unsalted butter, room temperature,
1 1/4 Apples, cored,peeled and sliced
1 cups granulated sugar, for the caramel
3/4 cups granulated sugar, for the cake batter
2 extra-large eggs, at room temperature
1/3 cup sour cream
1/2 tsp. grated lemon zest
1/2 tsp. vanilla essence

Sift together:
1 cup plus 2 tablespoons all-purpose flour
1/2 tsp. baking powder
1/4 tsp. salt

Confectioners' sugar, for dusting (optional)

Method:
Preheat the oven to 350 degrees F.
Grease a 9-inch glass pie dish or any oven proof 9 inch dish with butter and arrange the apples in the dish, so as to cover the dish .
Combine 1 cup of the granulated sugar and 1/3 cup water in a small saucepan and cook over high heat until it turns a warm amber color (about 360 degrees F on a candy thermometer. ...for the ones who have one .....I just use the color of the caramel as my guide). Do not stir this mixture, it cooks on its own .
Once the caramel is cooked swirl the pan and pour the caramel evenly over the apple slices.
In a different bowl cream the 6 tablespoons of butter and the remaining 3/4 cup of granulated sugar in the bowl of an electric mixer fitted with the paddle attachment, until light and fluffy. Lower the speed and beat in the eggs 1 at a time. Add the sour cream, zest, and vanilla and mix until combined. Sift together the flour, baking powder, and salt and, with the mixer on low speed, add it to the butter mixture. Mix only until combined. Pour the cake batter evenly over the apple slices and bake for 30 to 40 minutes, until a toothpick inserted comes out clean.
Cool for 15 minutes, then invert the cake onto a flat plate. If you have greased your dish generously and allowed the tatin to cool for its given time, it will come out without sticking if in case an apple slice sticks, ease it out and replace it in the design on top of the cake.
Serve warm or at room temperature, dusted with confectioners' sugar.
If you like it warm as I do , just microwave it for few seconds and you get the same oven fresh taste everytime.

Happy Women's Day !

March 8th is the International Women's Day, so for all you wonderful women out there these lines from Altaf Hussain Hali's poetry ....just for you !

Aye Maaon , behno, betiyon , duniya ki zeenat tumse hai,
Mulkon ki basti ho tumhi , Qaumon ki izzat tumse hai.

(O mothers, sisters and daughters, you are our wealth and pride,
You are the nation's honor, the source of bustling life ---- as translated by K.C. Nanda)

Happy Women's Day !!!